Getting started
Ingrain Security runs inside your coding agent and threat-models an implementation plan as part of planning. The Ingrain CLI gives it your organization’s security rules, so the implementation guidance it proposes follows established practice.
Setting both up takes four steps.
1. Install the plugin
Section titled “1. Install the plugin”The ingrain-security plugin lives at
github.com/ingrainlabs/ingrain-security.
Add the marketplace to your coding agent, then install the plugin.
In Claude Code:
/plugin marketplace add ingrainlabs/ingrain-securityIn Codex:
codex plugin marketplace add ingrainlabs/ingrain-securityInstalls are pinned to the v<version> git tag, so
you only ever receive tagged releases.
2. Install the Ingrain CLI
Section titled “2. Install the Ingrain CLI”The Ingrain CLI ships as a single self-contained binary and runs on macOS, Linux, and
Windows (x86_64 or arm64; Windows is x86_64 only). Prebuilt binaries are distributed
through the public proxy at cli.ingrainlabs.dev.
Run the one-liner for your platform.
On macOS and Linux:
curl -fsSL https://cli.ingrainlabs.dev/install.sh | shOn Windows (PowerShell):
irm https://cli.ingrainlabs.dev/install.ps1 | iexThe installer downloads the latest release binary, verifies its SHA-256 sum against the
release manifest, and places ingrain on your PATH. Confirm it is there:
ingrain --helpThis prints Usage: ingrain ... and the available subcommands. If it errors instead, see
Troubleshooting below.
3. Create an API token
Section titled “3. Create an API token”Open the Ingrain Context Platform and select Ingrain CLI configuration in the sidebar. On the Ingrain API Token page, optionally give the token a label, then generate it.
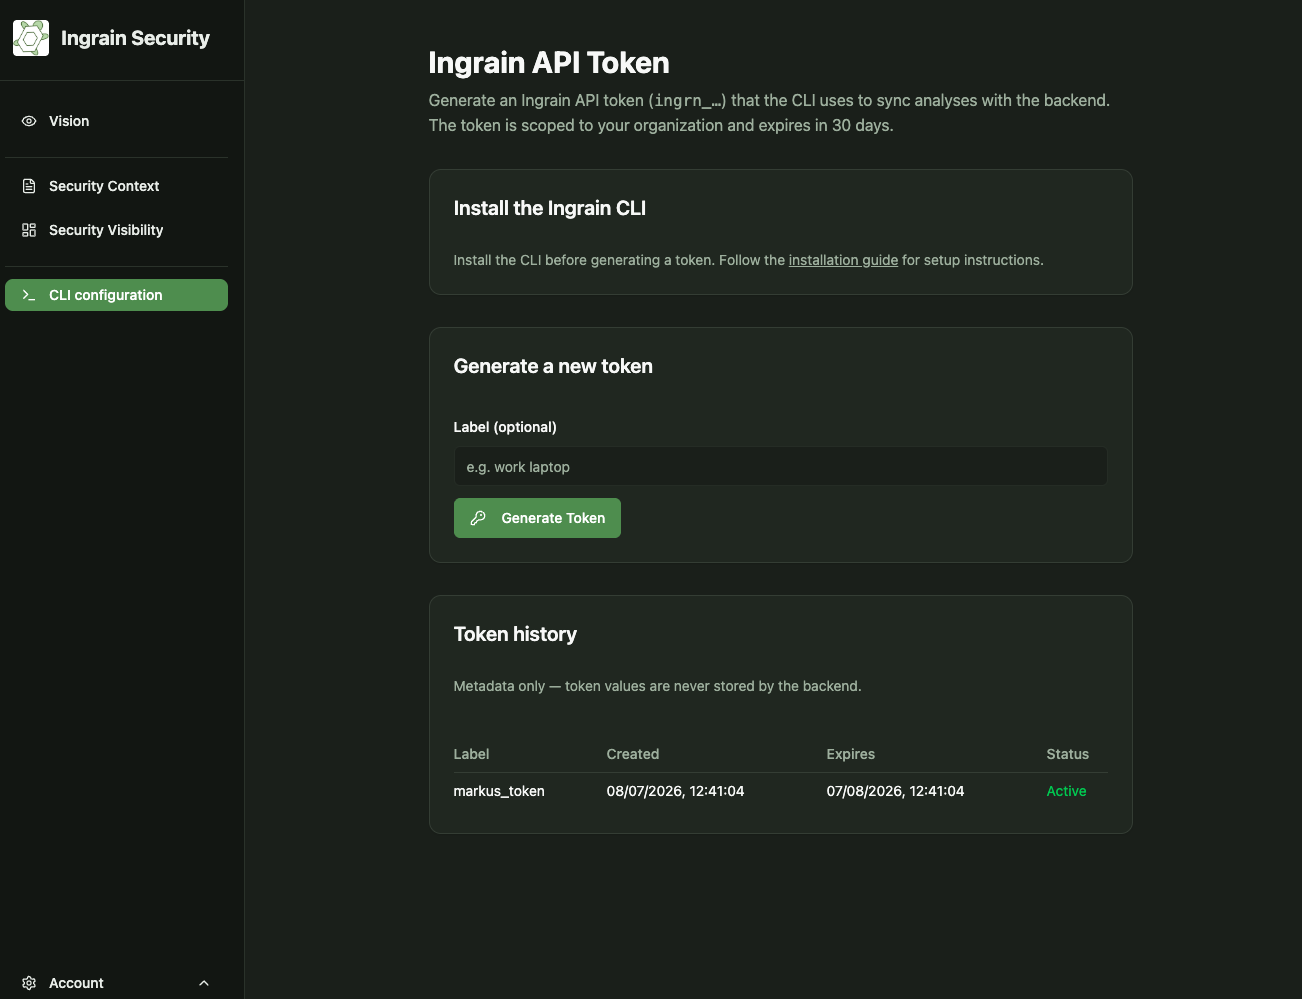
The token is scoped to your organization, begins with ingrn_, and expires after 30
days. It is shown once — copy it before leaving the page. The backend stores only
the token’s metadata (label, creation date, expiry), never its value, so a lost token
must be regenerated rather than recovered.
4. Configure the CLI
Section titled “4. Configure the CLI”The CLI reads its settings from a user-level conf.toml. Print its path:
ingrain configThat command prints the path; open the file in your own editor. The
location depends on your platform: ~/.ingrain/conf.toml by default,
$XDG_CONFIG_HOME/ingrain/conf.toml if that variable is set, or
%APPDATA%\ingrain\conf.toml on Windows.
Open the file and add a [context] section holding your platform’s sync URL and the
token from step 3:
[context]syncUrl = "https://app.ingrainlabs.dev/ingrain-agent-sync"ingrainApiToken = "ingrn_..."![A user-level conf.toml with a filled [context] section, showing syncUrl and ingrainApiToken](/screenshots/getting-started/conf-toml.png)
Verify the whole chain end to end:
ingrain context security_rules "authentication" --limit 3Rules coming back means the plugin will find them too. See the
[context] configuration reference and the
context command for the full set of options.
Upgrade
Section titled “Upgrade”Once installed, the CLI manages its own upgrades:
ingrain upgradeThis re-fetches the latest release through the same install proxy. See the
upgrade command for flags, and the
[upgrade] config section for customising the proxy URL.
Uninstall
Section titled “Uninstall”ingrain uninstallRemoves the ingrain binary and its PATH entry. Your ~/.ingrain/ directory is
preserved — conf.toml and any session data survive a reinstall, so your settings
carry over. Delete it by hand for a clean wipe. See the
uninstall command.
Troubleshooting
Section titled “Troubleshooting”ingrain: command not foundafter install — the installer wrote the binary to your install dir but the shell hasn’t picked it up. Open a new shell orsourceyour profile.
Next steps
Section titled “Next steps”- Browse the full command reference.
- Tune defaults via Configuration.